Certum Open Source Developer Code Signing Certificate
In order to sign One ROM Studio Windows releases, to encourage Windows’ Smart Screen to let users run my application, I bought a Certum Open Source Developer Code Signing Certificate.
The process for obtaining and enabling the certificate was slow and awkward. I’m documenting the steps here for anyone else who might want to try it - and so I can renew next year. All told I probably spent about a day on this.
Buy the Open Source Code Signing Set
When first purchasing the certificate from Certum, you must buy the “set” - this includes a smartcard (SIM card) and a smartcard reader, as well as some brief instructions.
At the time of writing this cost €69, plus shipping to the UK of €35. In future years, I think you just pay €29 renewal, as you have the smartcard and reader already.
The kit was posted next working day, via DHL, and arrived the following day - good going from Poland to the UK.
Installing Smartcard Software
The smartcard requires software and drivers.
You install proCertum CardManager from Certum’s website.
You install the drivers for the smartcard reader - in my case, the ACS ACR40T Standard - from the ACS website. Certum has a link to the website, but not the correct driver. I had to find it myself.
You must restart your PC after installing proCertum CardManager.
Setting Up Smartcard
You pop the SIM card (smartcard) out of the larger card and install it into the reader (the correct orientation - there is a very small picture on the reader).
You then need to configure the smartcard using the proCertum CardManager software - specifically setting PIN and PUK codes.
To do this, start proCertum CardManager, select “Common Profile”, then set the PUK and PIN code. Obviously, keep a note of these codes somewhere safe!
Requesting the Certificate
This is done via Certum’s website. Go to “My Account” and “Data security products”.
I can’t remember exactly what I did here, but I think I had to enter the smartcard’s serial number (found in proCertum CardManager and on the credit card sized bit of plastic you popped the SIM card out of).
You have to enter your personal details (name, address), and choose how to have your identity verified. I chose the automated approach. This involved entering my email address. IDNow then emailed me instructions to verify myself. I did this on my phone, photographing both sides of my driving licence, and recording myself moving my head. As soon as I went back to Certum, my identity had been verified.
You also have to verify your organization. As this is an open source certificate, you must upload details of your open source project. The website also said to provide a utility bill. I uploaded a recent water bill, and a PDF document with links to the One ROM website, GitHub repo and license - showing that One ROM is open source.
Waiting
It took Certum 2 days to process my application, and they emailed me to say the certificate was ready to be installed. During this time, the status on the Certum website was “Under Verification”.
Activating the Certificate
Wait, not so fast! You can’t just install the certificate, you have to activate it first. This involves an opaque process on the Certum website, where you have to install SignService. This is NOT the same as their SimplySign or SmartSign applications. Instead there is a link to install it as you go through the activation process.
Once you have installed SignService, you can then kick off the activation process of the website. I used Chrome. I think it drove the smartcard to generate a public/private keypair, and then sent a certificate signing request to Certum.
This ended with the certificate installed and activated into the smartcard - not sure if I had to do do anything further manually to get the cert active on the smartcard. In any case I now had a valid certificate:

Using the Certificate
Hard part over, right? No, “tonight may be bad, but tomorrow will be worse than you can possibly imagine”.
The standard Windows code signing tool is signtool.exe, part of the Windows SDK. I had already installed this via the Visual Studio Installer, as part of the Desktop Development with C++ package, for building the Rust x86_64-pc-windows-msvc target. I had to find the .exe, here:
C:\Program Files (x86)\Windows Kits\10\bin\10.0.26100.0\x64\signtool.exe
OK, good. Now the certificate needs to get into your Personal Certificate store in Windows. You can view the certificates in your store using certmgr.msc.
I did this by selecting “Show certificate details” in proCertum CardManager, then “Install Certificate”. I chose “Current User” and “Place all certificates in the following store”, choosing “Personal”. This was IMPORTANT - the “automatically select the certificate store” option did NOT produce good results. (Well neither did “Personal”, but we’re coming to that.)
I then checked the certificate was installed. I went to the certificate details (in proCertum CardManager or the certificate store - doesn’t matter), and copied the long SHA1 “Thumbprint” value. I then ran:
C:\>certutil -store -user MY <THUMBPRINT>
It gave this output:
MY "Personal"
================ Certificate 13 ================
Serial Number: <SERIAL_NUMBER>
Issuer: CN=Certum Code Signing 2021 CA, O=Asseco Data Systems S.A., C=PL
 NotBefore: 30/10/2025 11:44
 NotAfter: 30/10/2026 11:44
Subject: CN=Open Source Developer, Piers Finlayson, O=Open Source Developer, L=<Location>, S=<State>, C=GB
Non-root Certificate
Cert Hash(sha1): <THUMBPRINT>
No key provider information
Missing stored keyset
CertUtil: -store command completed successfully.
Note the “No key provider information” and “Missing stored keyset” - this is because the private key is on the smartcard, not in Windows, and installing the certificate has not told Windows where to find the private key (the smartcard).
This led to hours of problems, where I could persuade certutil to find the private key on the smartcard, prompting for my PIN, but not signtool. signtool would error out with:
SignTool Error: No certificates were found that met all the given criteria.
Or, if I explicitly pointed signtool at the smartcard using the /csp and /kc options, it would error out with:
SignTool Error: An unexpected internal error has occurred.
Error information: "Could not associate private key with certificate." (-2147024891/0x80070005)
In the end I fixed the missing key provided/keyset information by creating this keyinfo.inf file - SUBJECT_KEY_ID is the “Subject Key Identifier” value from the certificate details:
[Properties]
2 = "{text}"
  _continue_ = "Container=<SUBJECT_KEY_ID>&"
  _continue_ = "Provider=Microsoft Base Smart Card Crypto Provider&"
  _continue_ = "ProviderType=1&"
  _continue_ = "Flags=0&"
  _continue_ = "KeySpec=2"
I then ran:
certutil -repairstore -user MY <THUMBPRINT> keyinfo.inf
This completed successfully:
...
CertUtil: -repairstore command completed successfully.
Then I ran this again:
C:\>certutil -store -user MY <THUMBPRINT>
This time it asked for my smartcard PIN and then gave:
...
Cert Hash(sha1): <THUMBPRINT>
  Key Container = <SUBJECT_KEY_ID>
  Provider = Microsoft Base Smart Card Crypto Provider
Private key is NOT exportable
Signature test passed
CertUtil: -store command completed successfully.
Hooray! Windows can now find the private key on the smartcard.
Signing Code
Now, finally, I could sign code using signtool. The command I used was:
signtool.exe sign /sha1 <THUMBPRINT> /fd SHA256 /td SHA256 /tr http://timestamp.digicert.com <FILE_TO_SIGN>
It asked for my PIN and then signed the file:
Done Adding Additional Store
Successfully signed: <FILE_TO_SIGN>
When I check the properties of the signed file, I can see the signature:
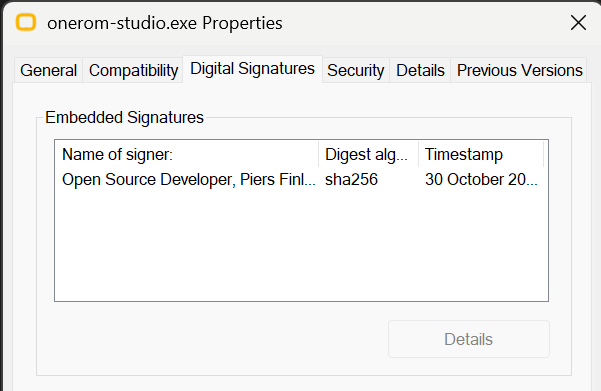
And it looks valid:
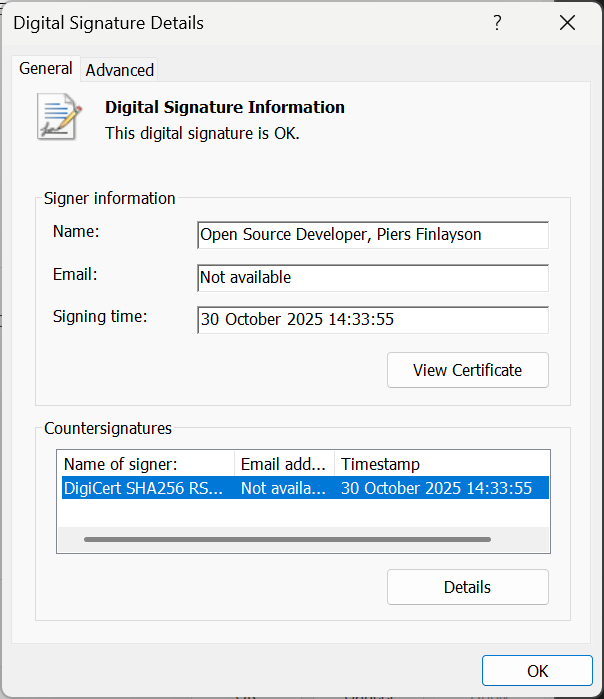
What a massive ball-ache!
Appendix
During this process I found this Reddit thread, which documents a different procedure for installing the certificate. This did NOT work for me, but may be of interest to others.
comments powered by Disqus